
Once you've finished stitching, you may be wondering how to get your piece ready for hanging. Here are some helpful photos and tips to walk you through finishing your project. Please note that these are just suggestions and based on supplies that come with Junebug and Darlin kits. If you have your own supplies or ways of finishing, keep on trucking with your go to methods! My goal is to provide stitchers with the knowledge to make heirloom quality cross stitches and actually get these pieces on the wall or into the hands of your loved ones.
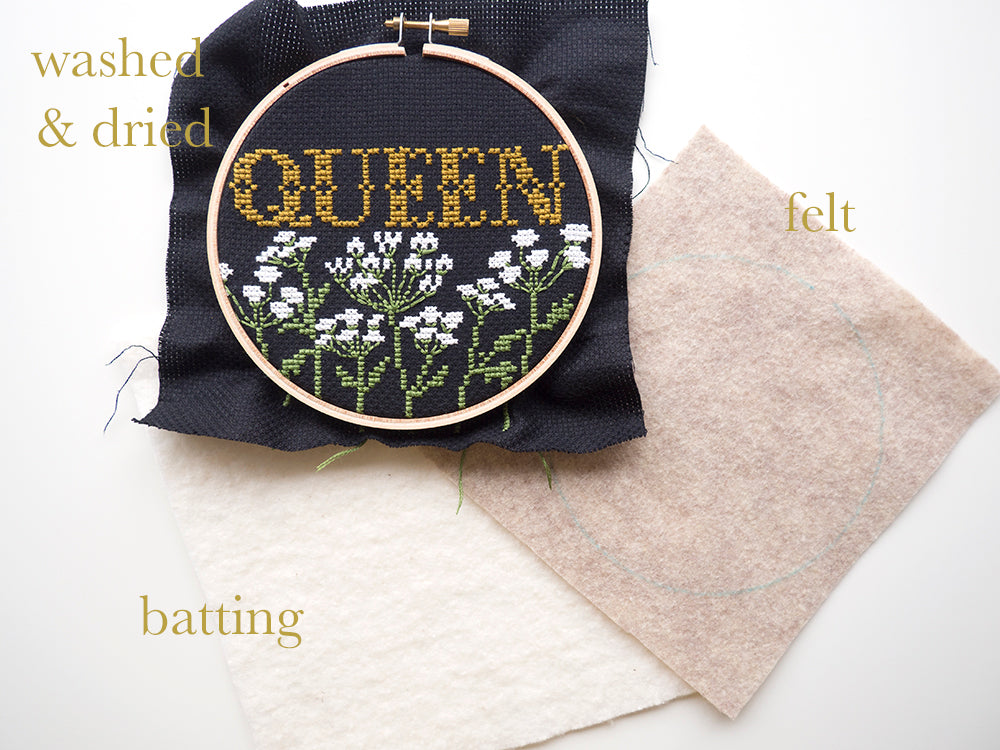
Each kit comes with organic batting and a piece of felt. The batting is cut to approximately the same size as your Aida cloth and the felt is cut to 1" larger than the kit's embroidery hoop. Before you begin backing, make sure your finished stitches are washed and completely dry.

Before you begin backing, trace the embroidery hoop onto the felt. I use an embroidery marker because it easily draws onto fabric, but any type of marker or fabric pen will work. You can trace the inside of the outer hoop, or the outside of the inner hoop. (Both are the same size.) Then set aside.

Layer the batting onto the backside of your Aida. Place both pieces of fabric between the inner and outer hoop rings. Make sure the front looks as desired, centered and all. Stretch both the batting and Aida until taught. Tighten the hoop with the screw at the top and pull taught until there are no wrinkles or creases. It helps to look at the front of the hoop as you stretch to make sure it's staying in its desired position.

Trim off the excess fabric (Aida and batting). I casually cut off the corners and not much more. Ideally, the fabric will still extend 1/2" - 1" outside the hoop edge.

Thread your needle with waste thread. I prefer Coats Upholstery Thread, but you can use any sort of polyester thread, extra embroidery floss and even DENTAL floss! Tie a knot at the end of the floss leaving a tail you can hold onto (anything longer than 1" will be fine).

Stitch around the outer edge of your cloth.

The stitches will be hidden, so they don't need to be even or pretty. These are called "basting" stitches.

Pull the beginning and ending threads.

As you pull, the fabric will begin to curl towards the center of the hoop.

Pull as much as the thread will let you and tie off the ends together. Clip the excess thread so the tails cannot be seen from the front.

Revisit your felt and cut along the traced line.

Make sure to place your felt with the tracing marks facing towards the hoop so they are not visible post stitching.

Thread your needle with some more waste thread and tie a knot at the end. Pull through the underside of the fabric to hide the knot.

Stitch the felt to the Aida cloth around the edge of the felt. You can use an overcast stitch, whip stitch, blanket stitch, or whatever other stitch might suit your fancy.

Stitch around the whole outer edge and tie a knot at the end. Clip excess thread.

Voila! Now your piece is ready to be hung.