
Article: Biscornu Pincushion
Biscornu Pincushion
Looking for a new way to finish your cross stitch projects? Consider a biscornu pincushion, like this one made with Snowflake Ornament 6.
A biscornu is a pincushion made from two squares of the same design that are joined in an offset hemline, resulting in an eight-pointed star pillow. The pincushion is then stuffed and with a button added, create a truly unique pincushion or ornament for the holidays

To make the biscornu seen here, you'll need:
- 2 pieces of 14 count Aida cloth
- Tapestry Needle
- 1 skein DMC embroidery floss
- Stuffing
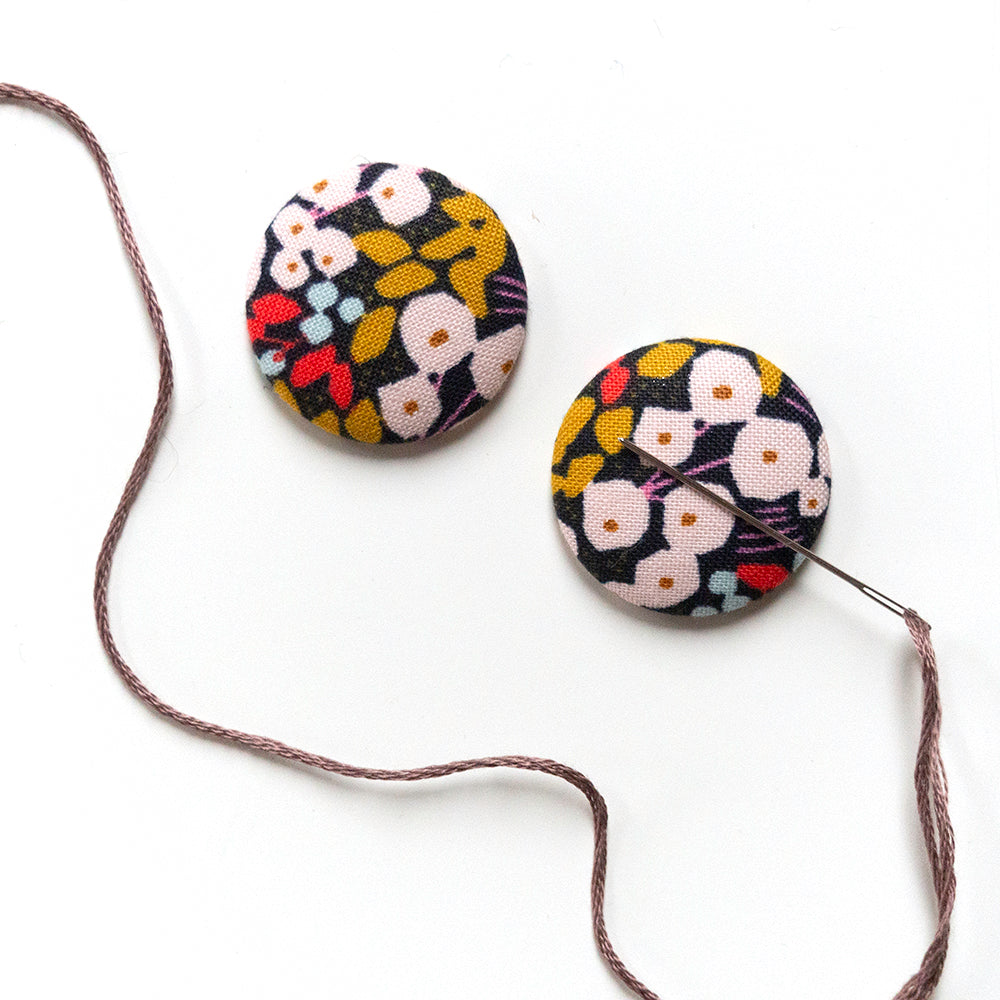
- 2 small buttons
- Scissors
- Optional: 3" Embroidery hoop for stitching the pattern, Snowflake Pattern
Depending on the size of your finished cross stitch pattern, the size of your pincushion will vary. This project uses the Snowflake Ornament 6 cross stitch pattern and finishes to 3" around.
How to Make a Biscornu Pincushion


After stitching your snowflake pattern, backstitch 4 squares from the furthest stitch. Complete the backstitching on both pieces of Aida cloth.

Trim the seam allowance to 1/2" from the backstitching line.

Finger press the edges and create mitered corners on both pieces.

Line up the middle of one piece with the corner edge of the second.

Stitch through the backstitching only using a whip stitch. Do not stitch through the Aida cloth.

Once the corners are seamed, the form of the biscornu will begin to take shape.

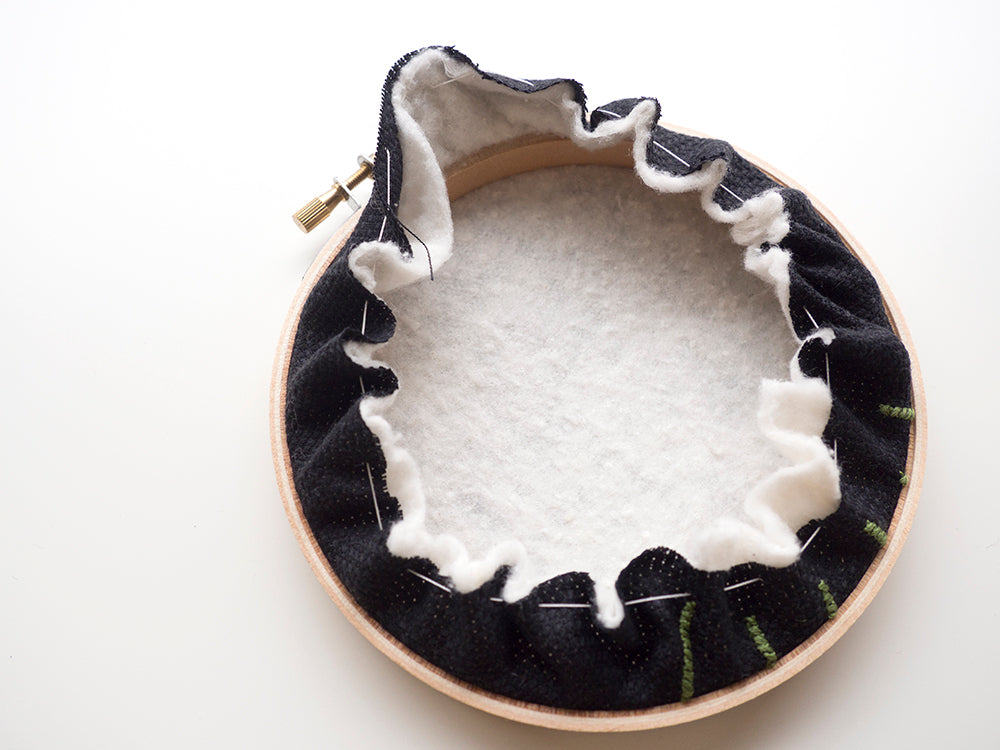
Do not finish stitching the biscornu closed just yet. Stitch until only 2 sides are left. This project is a great opportunity to use scrap materal. I used scraps of apparel fabric, batting and felt (from trimming my projects for framing) to stuff my biscornu. However, new poly fill used for stuffed toys and pillows works great.

After stuffing the pincushion, finish seaming all sides.
TIP: If you cut your embroidery floss long enough, you can leave a long tail to use a continue piece of floss to hang your ornament.

If you need to, cut a piece of thread approximately 8" long. Use the loop start method to attach the thread to one of the corners of the pincushion, knot the end and pull through the Aida. Clip the thread to hide the tail ends.

Final step - attach the buttons!
Attaching the buttons is what gives the biscornu it's final shape. Tie a knot, or use a loop start to secure a piece of thread to the middle of the biscornu. Stitch through the button and through the other side of the biscornu. Pull as taught as possible without breaking the thread. Stitch back and forth through the buttons 2-3 times to secure and pull the center taught. Tie off the thread under one of the buttons and snip tails to hide.

1 comment
This is so fun! Thank you for the tut!
Sienna
Leave a comment
This site is protected by hCaptcha and the hCaptcha Privacy Policy and Terms of Service apply.